Geant4-toolkit
Contact me: geant4.toolkit.zabihiATgmail.comGeant4-toolkit
Contact me: geant4.toolkit.zabihiATgmail.comدرباره من
 زمینههای کاری, TOF-PET, Geant4، Monte Carlo Simulation، Radiobiology، radiation-DNA interaction process، Geant4-DNA، Radiation Effects//
ادامه...
زمینههای کاری, TOF-PET, Geant4، Monte Carlo Simulation، Radiobiology، radiation-DNA interaction process، Geant4-DNA، Radiation Effects//
ادامه...
Geant4 Installation Guide
Contact me: geant4.toolkit.zabihiATgmail.com
GEANT4 installation on Ubuntu
There are several ways to install Geant4 on your computer. Which one is available or best for you depends on both your operating system and usage requirements. In all cases, always use the most recent Geant4 release to ensure use of the latest bug fixes, features, and help the developers and community to provide quick user support. Here, I describe my way:)
To install Geant4 there are several steps. Just follow them carefully.
Step 1 – Update and Upgrade :
First of all, you must update and upgrade your Ubuntu platform. For doing that, it's better to change Ubuntu update center's setting. So follow bellow steps:
- Search ''update'' on Ubuntu's search engine and then select ''software updater'' then choose setting. In the first tab of setting page , change ''download from'' from ''server for your country'' to ''main server'' and also tick the check marks like bellow figure. Untick (deselect) “restricted” parts.

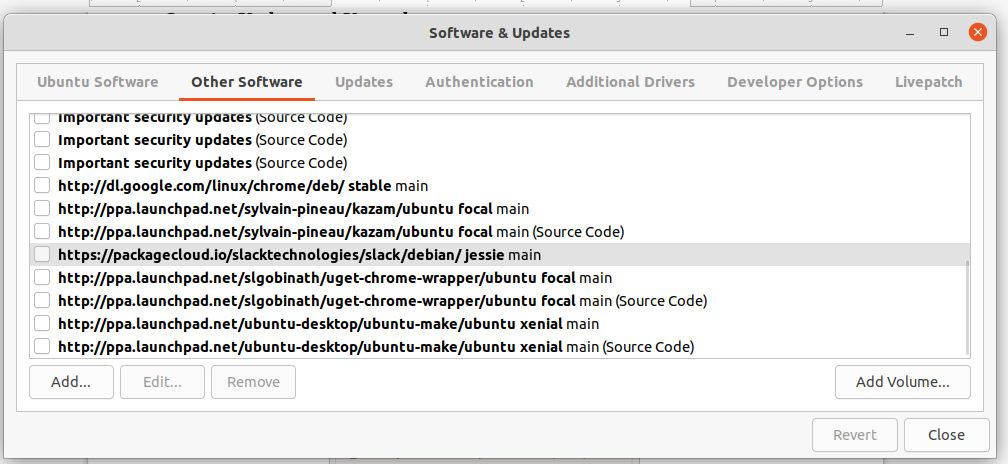
- In the next tab (other softwares) just tick the ''source code''s and deselect all other parts. Then close the window.
- sudo apt-get update
- sudo apt-get upgrade
Step 2 – Software Required to Build Geant4
Enter bellow commands in terminal one by one and wait to complete (Be sure have seen "done" for each one).
Note: pay attention about the probable error and notification, all of the processes should be finished correctly.
* sudo apt-get install g++
* sudo apt-get install libxmu-dev
* sudo apt-get install freeglut3-dev
* sudo apt-get install mesa-common-dev
* sudo apt-get install mesa-utils
* sudo apt-get install libglu1-mesa
* sudo apt-get install libgl1-mesa-dev
* sudo apt-get install libgl1-mesa-dri
* sudo apt-get install libxi-dev
* sudo apt-get install libxerces-c-dev
* sudo apt-get install expat
* sudo apt-get install libexpat-ocaml
* sudo apt-get install libexpat-ocaml-dev
Step 3 – install CMake 3.3 or higher.
Geant4 uses CMake to configure a build system for compiling and installing the toolkit headers, libraries and support tools. In this step we must install CMake compiler on our platform. First go to cmake page and download the Uinx/Linux Source with .tar.gz format. (Source distributions:)
Then unpack downloaded file and copy the folder in your home page or any directory you want. Now open cmake folder and open terminal in the same folder (directory). Then write three bellow commands one by one. Wait to complete the configuring and making installation. When configuring complete you must face with comment like this: ''CMake has bootstrapped. Now run make''
- ./configure (If the downloaded file is complete, just type two frist letters then click the tap key. It must be filled out)
- make -j6 (6 is number of core of your system)
- make install
- sudo chmod ¬R 777 /path
Step 4 – install QT

After download, just extract source file and leave data files compact and then copy both folder (data and geant4-source) to ''/usr/local/include/'' . Before copying the files, please type this command on terminal
- sudo chmod ¬R 777 /usr/local/include/
Now go to this path "/usr/local/include/geant4-source/cmake/Modules". Then find and open ''Geant4InstallData.cmake'' file and press Ctrl+F and type '' cern '' to find a CERN's URL. Now delete the URL (as follow)
set GEANT4_DATASETS_URL http://geant4.cern.ch/support/source
Now replace the data folder's path :
set GEANT4_DATASETS_URL /usr/local/include/data/
Save the file and go back to geant4-build and right-click and select open in the terminal and then enter following commands:
cmake -DCMAKE_INSTALL_PREFIX=/usr/local/include/geant4.10.07_install
This is the installation path (will create once installation done): /usr/local/include/geant4.10.07_install
And this is the source path: /usr/local/include/geant4.10.07_source
Replace 'geant4.10.07' with your version.
Note: pay attention to see ''configuring done''
Then type:
• make -jn
If your computer has n core you should enter n after j. The last command for installing geant4 is mentioned here:
• make install
Step6 – Configuring the Environment
Step7 – Run an example
To run a project first go to example's directory in
/usr/local/include/geant4.10.7_install/share/Geant410.7
and copy'' examples'' folders in home page. Now open example in home directory an then choose one of three folders (Basic/B1 )
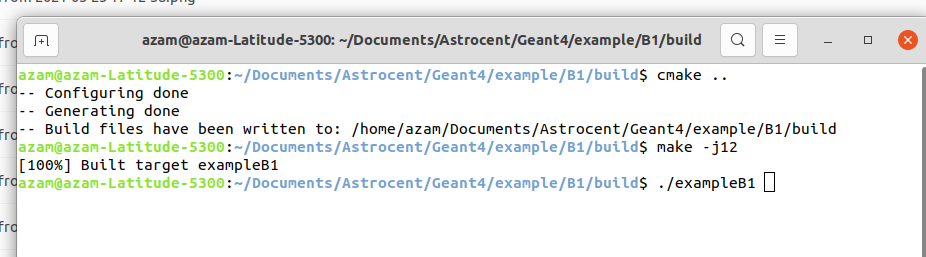
Then create a Build folder inside the B1 folder. Go to the Build folder and open terminal and type:
cmake ..
then
make -jn
then
./exampleB1
Download PDF file (Geant4 Installation Guide).
Geant4 First Steps Course: John Apostolakis
| Google it: geant4 site:videos.cern.ch |
You forgot the letter e at the end of the ''sudo apt-get upgrade" . please fix it !
Thanks